
Great gift idea
Are you looking for a great gift idea for teachers, for Mother’s Day or for a friend’s birthday? Stamped books are a great gift that adds a personal touch!
Home decor
Stamped books are also a great way to add a personal touch to your home decor. You can add your favorite Bible verse or quote, the names of your family, your classroom theme…really the sky is the limit on what you can stamp on your books.
Where to begin
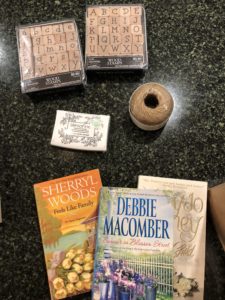
You begin by collecting books. I look for paperback books at garage sales, resale shops, and most recently, at our library’s book sale. I was able to fill a grocery sack full of used books and it only cost $1 per sack. You want to look for books that are around 1″ thick. It doesn’t matter what shape the cover is in because you are going to tear them off anyway. The other supplies you will need include stamps and a stamp pad, plus jute or ribbon.
Let’s get started
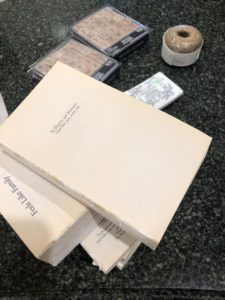
Step 1: Carefully tear off the front and back cover, plus the spine of the book. These actually come off very easily, but if part of the cover gets stuck on the spine, you can use a razor blade or knife to carefully scrape it off. You might also want to tear off a few pages of the book until you get to a page with very few words. I like to use the title page or the dedication page because it is mostly a white page.
Step 2: Decide what you are going to write. You probably need to write it on a scratch pad for practice.
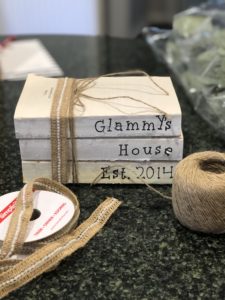
Step 3: Get the stamps lined up. I start going from right to left so I basically stamp the word backward, just so that I know that I have plenty of room and the word will end at the end of the book spine.
Step 4: When stamping, make sure you don’t blot the ink heavily or you’ll make a mess on your stamp. I am careful about getting too much ink on the stamp, but don’t worry about being perfect. This isn’t about perfect. Imperfections just add character to the books.

Step 5: When you are finished stamping all of your letters, you can use a ultra fine point sharpie to touch up any areas that didn’t stamp well.
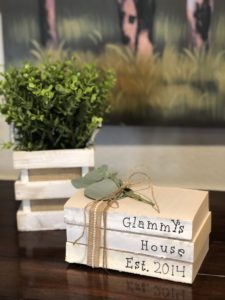
Step 6: Wrap your books in a cute ribbon to match your decor. I added some burlap ribbon that had little pearls attached. Then I tied a bow made of jute. You can add a flower, greenery or a cute gift tag to the ribbon.
That’s all folks!
Honestly, this is one of the easiest craft projects that you can do. It took longer to gather the supplies than it did to create the finished product. Other varieties of this project include using hardback books and painting the cover with chalk paint. Or if you don’t want to ruin the book, you can always cover with paper of your choice and then proceed with the stamping as mentioned above.
Use your books to add a fun accessory to your desk at work or display it on a bookshelf in your home. Whether you make these books for yourself or for a friend, it will add a fun touch to your decor.
Be blessed,
That is a very cute, unique idea! You know if you ever want to retire I think you would have a great opportunity for a fun job online!
I’d love to retire! Just have to convince Darren! Lol
I loved reading this, Vickie! And I loved your idea of stamping backwards! I’m still terrified of stamps though! lol!
What a great idea I’m on a budget for Christmas and making ? . instead of buying them for my three beautiful daughters
where did you buy the rubber stamps?? I love them
I bought them at Hobby Lobby.